

|
Product Details:
|
|
| Place of Origin: | China |
|---|---|
| Brand Name: | Jekit |
| Model Number: | GT6>4 |
|
Payment & Shipping Terms:
|
|
| Minimum Order Quantity: | 1set |
| Price: | Factory Price |
| Packaging Details: | Box Size 45*45*45cm |
| Delivery Time: | 5-7 days |
| Payment Terms: | Western Union/Paypal,, T/T |
| Supply Ability: | 600 sets Per Month |
|
Detail Information |
|||
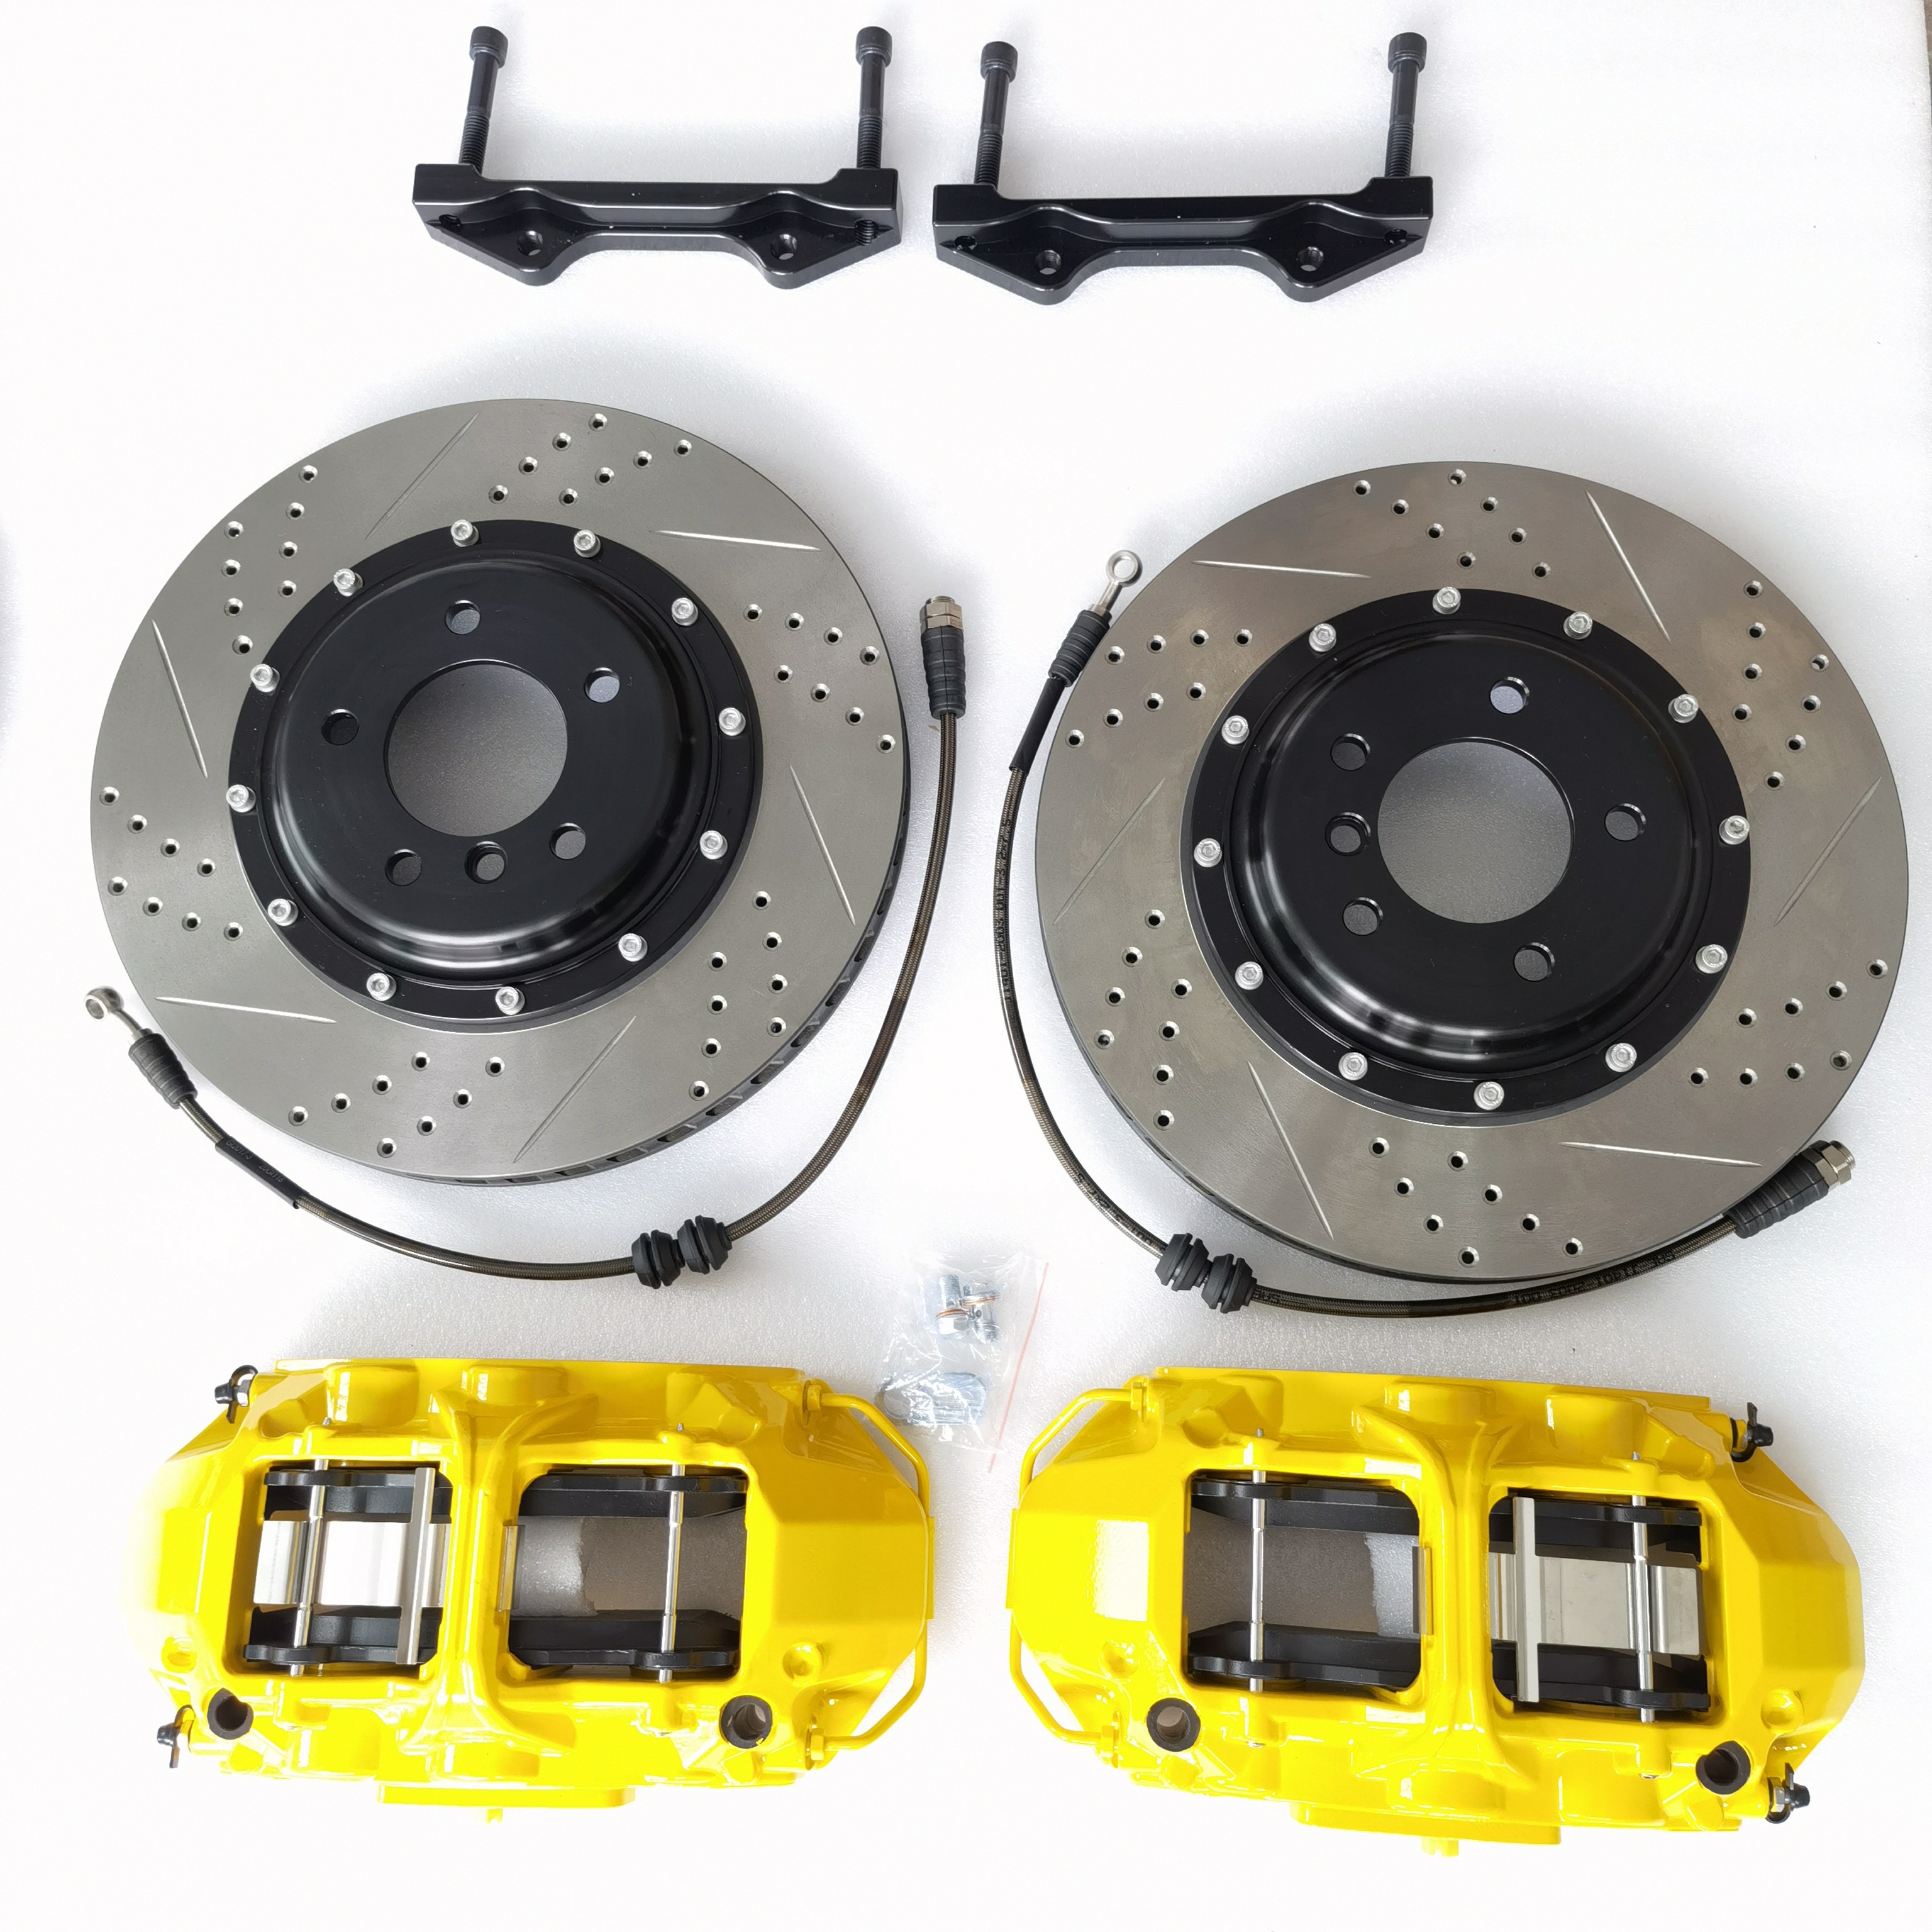
| Item Name: | GT6>4 Brake System | Caliper Pots: | 6 Pots/4 Pots |
|---|---|---|---|
| Front Disc Size: | 355x32mm | Rear Disc Size: | 355x28mm |
| Fit Wheel: | Rim 18 Inch | Disc Material: | Grey Cast Iron HT250 |
| Caliper Material: | 6061 T6 Aluminum | Color: | Red/Yellow/Custom Color |
| Highlight: | 355x32mm Front Brake Caliper,18in Wheel Brake Caliper Kit,GT6 Disc Pad Kit |
||
Product Description
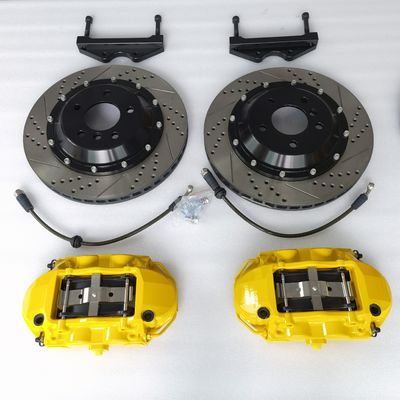
Jekit Front Brake Caliper 355x32mm Rear 355x28mm Disc Pad Kit
BASIC BRAKE KIT INSTALLATION INSTRUCTIONS
Fitting a Hat-Type Disc Rotor
The following steps are recommended to ensure the best possible results after fitting a hat type disc rotor:
1. Remove wheel.
2. Remove brake pads and push caliper piston back. Start by first loosening the bleeder so as not to push contaminated fluid into the system. Check caliper condition e.g. slides are not stiff or worn.
3. Remove caliper from its supports without disconnecting brake line, making sure to secure it without letting it hang.
4. Remove old brake rotor.
5. Check hub bearings for wear, replace as necessary (refer to the vehicles manual for exact specifications).
6. Remove any scale or grit off hub face to ensure positive contact with the inside of the new rotor.
7. Fit new disc rotor to hub making sure it is indexed to a point with minimum run-out (using a radial dial indicator).
8. Refit brake caliper.
9. Clean any grease or foreign material off the rotor with Brake Cleaner.
10. Select correct brake pads to suit the style and driving conditions of the driver and vehicle.
11. Check brake fluid condition and replace as necessary. Do not flush dirty fluid through the system, remove dirty fluid from reservoir first.
12. Refit wheel, tightening wheel nuts in correct sequence and to recommended torque settings.
13. Carry out road test and bedding-in procedure. Refer to brake pad manufacturer’s bedding in procedure.
14. Ensure vehicle owner understands that the rotors will take approximately 300km to bed-in.
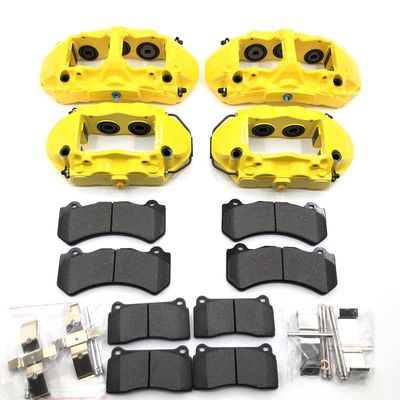
| Item Name | 6 Pots Brake Kit |
| Caliper Pots | 6 pistons |
| Color | Red/Yellow/Black/Blue/custom color |
| 355 | 355*32mm |
| Disc type | J hook/Drilled/Grooved/Slot straight lines/custom disc type |
| For Wheel size | 18 inch |
| Full set included |
1 pair brake caliper/1 pair brake disc with center cap and bracket/ 1 pair brake line/1 set brake pads |
| Item Name | 4 Pots Brake Kit |
| Caliper Pots | 4 pistons |
| Color | Red/Yellow/Black/Blue/custom color |
| 355 | 355*28mm |
| Disc type | J hook/Drilled/Grooved/Slot straight lines/custom disc type |
| For Wheel size | 18 inchh |
| Full set included |
1 pair brake caliper/1 pair brake disc with center cap and bracket/ 1 pair brake line/1 set brake pads |
About Brake System
Brake caliper replacement is pretty simple – until you get to the bleeding part. Then you’ll need a friend (and possibly a whole lot of patience) to finish the job. Fancy bleeder tools help as well.
Brake Caliper Replacement Costs
If you decide to have a professional replace your caliper, which is a smart move if you’re uncertain of your mechanical prowess, expect to pay anywhere from a few hundred dollars to over $1,000. That’s certainly not chump change, but it beats having brake problems if you do the job incorrectly.
However, if you’re confident that you’re up to the task, you can cut labor costs and expect to pay $50 to $100 for a replacement caliper. Some calipers are brand-new, while others are remanufactured.
What Tools Do You Need to Install a Brake Caliper?
The tools needed to replace a brake caliper vary, depending on what type of car you have. But in general, you’ll need:
A good buddy or a one-person brake bleeding tool
Appropriate size line wrench
Brake fluid
Brake line plug (sold at most auto parts stores)
Breaker bar
C-clamp or disc brake spreader
Fluid catch pan
Jack and jack stands
Large screwdriver or pry bar
Plastic container
Ratchet and appropriate size sockets (some calipers may require a Torx or Allen head socket)
Rubber hose that fits the bleeder screw
Safety glasses
Torque wrench
Wheel chocks
Should You Do the Job Yourself?
We’re talking about your brakes here. If you have any doubts about tackling the job, don’t do it yourself. Let a professional complete the work instead.
On the other hand, if you’re savvy with a wrench, brake caliper replacement is usually a fairly simple task. As was mentioned, the toughest part of the job is the post-replacement brake bleeding.
Brake Caliper Replacement
Now we get to the fun part: brake caliper replacement. Are you ready to grab a wrench and get dirty? Good.
Before we start, however, keep in mind that all vehicles are different. Be sure to follow the repair information for your specific application. Repair manuals, such as those from Chilton, are useful, but an ALLDATA subscription is even better. ALLDATA has single-vehicle subscriptions for DIYers that provide detailed factory repair information.
Note: The following are general guidelines for educational and entertainment purposes only. Consult your vehicle’s factory information for specific repair instructions and recommended safety precautions.
Also, this generic guide covers front brake caliper replacement. The procedures for rear caliper replacement are different.
Before you start replacing your calipers, keep in mind that all vehicles are different. Be sure to follow the repair information for your specific application.
![]()
Brown
![]()
![]()
Enter Your Message
| Guangzhou Yuanxing Industrial Co., Ltd. |
| Room 302, Building 5, No. 7, Wu Alley, Laowu Street, Dongping Village, Yongping Street, Baiyun District, Guangzhou |
| 86--18816787278 |
| 18816787278@163.com |